Chatbot User guide help
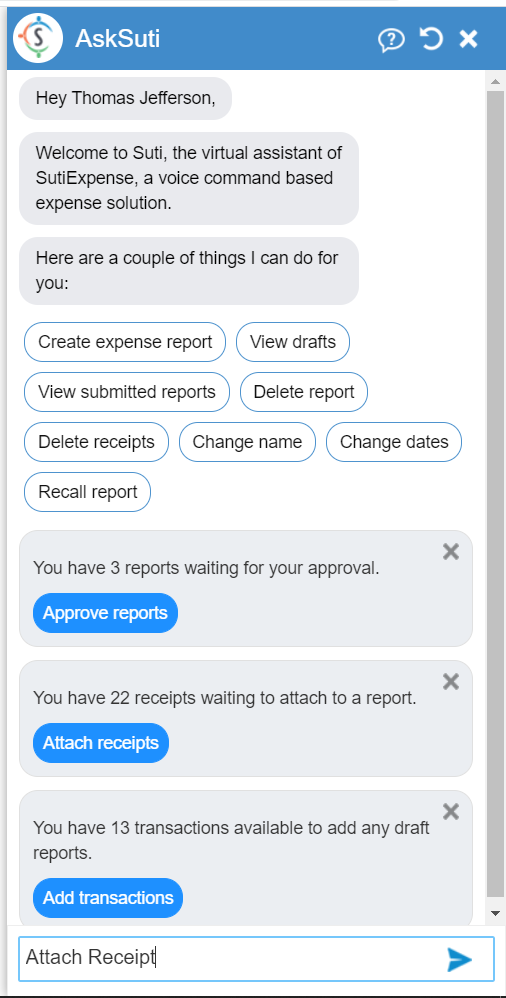
Attach Receipt
- Users can attach receipts to their expense reports right
from the chatbot. Simply say ‘Attach Receipt’ and the
chatbot performs that action.
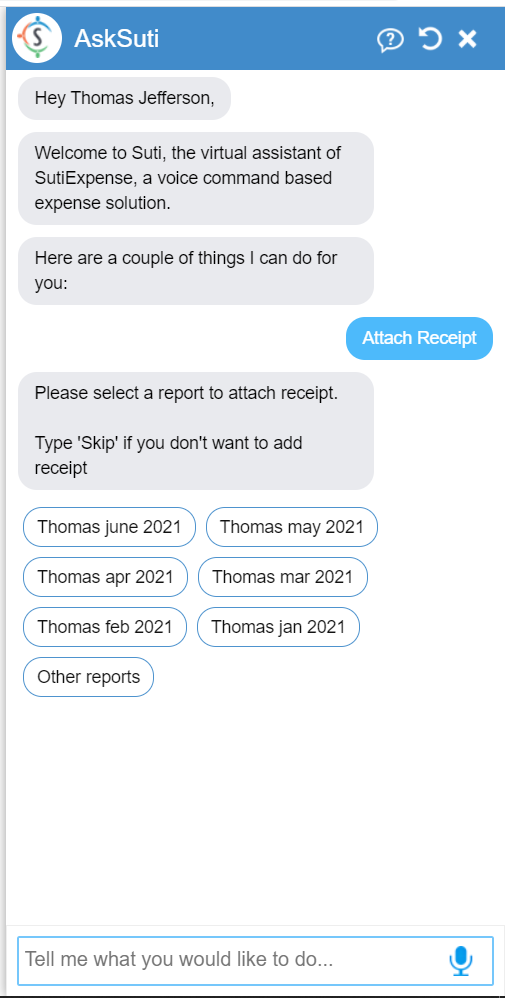
- Once the user asks to attach a receipt, chatbot shows the
reports in draft status. User has to select a report to which the
receipt is to be attached.
- Once a report is selected, chatbot shows the lineitems of
the report and asks the users to select a lineitem to attach the
receipt.
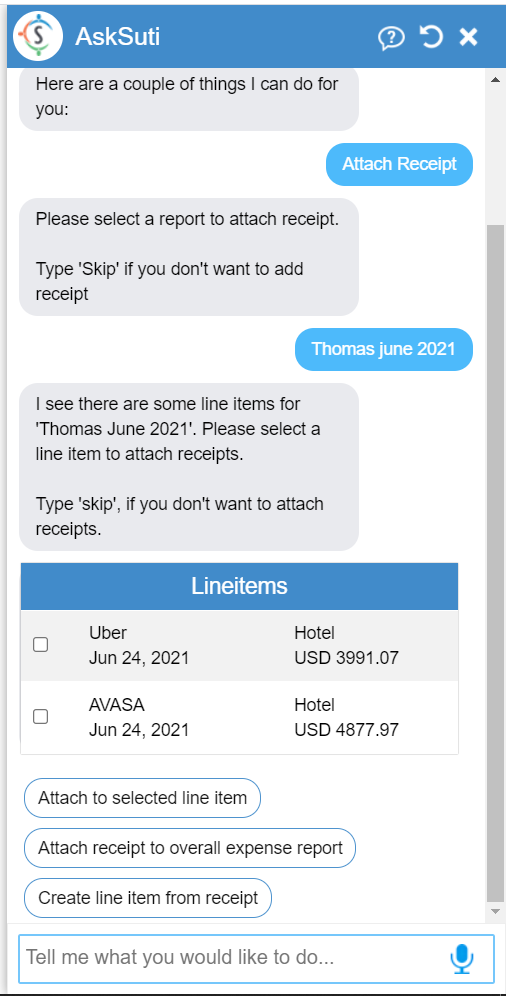
- Users can also select options like ‘Attach receipt to
overall expense report’ to attach receipt to the report and ‘Create
line item from receipt’ to create a new lineitem from the receipt.
For example, lets assume user has selected the ‘Uber’ lineitem and selected the option ‘Attach to selected line item’. The receipt will be attached to the 'Uber' lineitem.
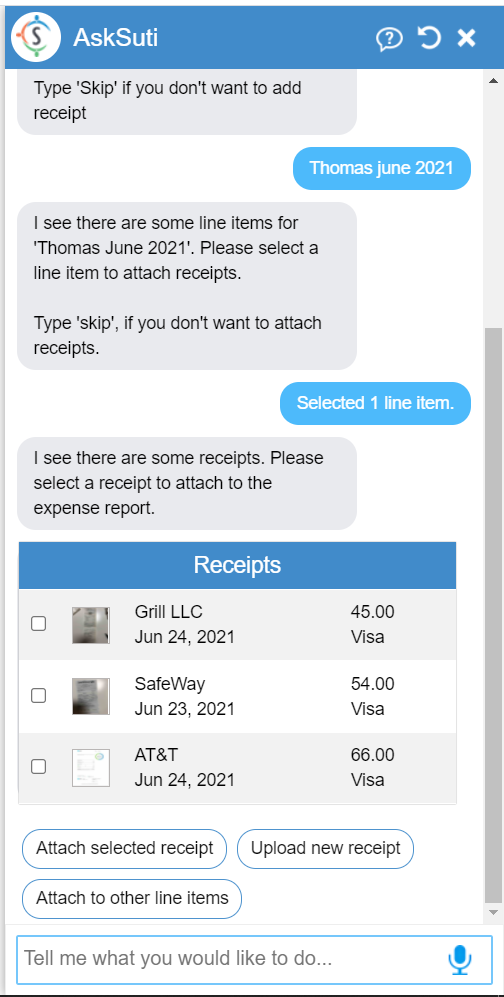
Receipts uploaded will be shown in ‘My Receipts’ page and users can select a receipt to attach it to the selected lineitem. - Select a receipt you wish to add to the lineitem, and click
on ‘Attach selected receipt’.
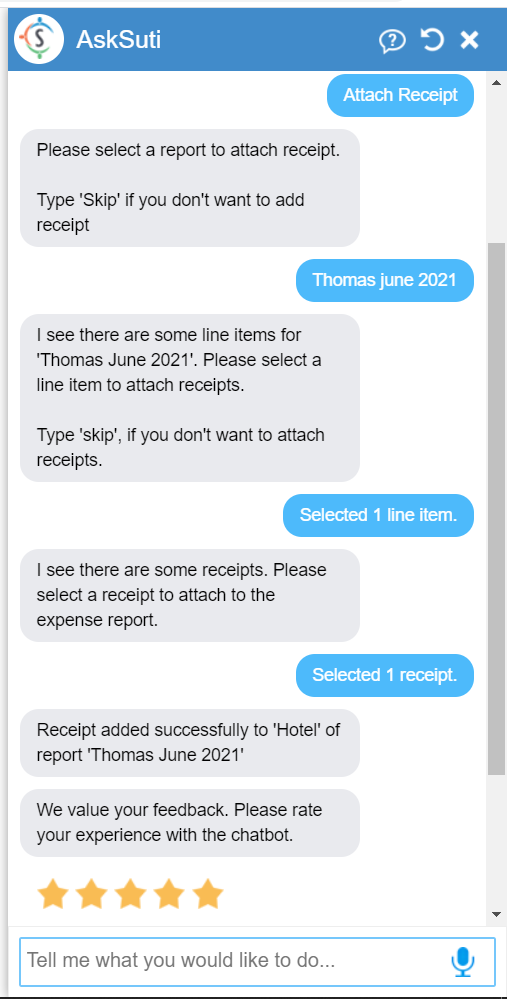
Chatbot has attached the selected receipt successfully to the lineitem of a report.